

Appliance degreasing is the targeted removal of grease, oil, and fatty residues from household appliances using solvents or emulsifying agents. The process prevents sticky films from forming on surfaces, which attract dust and reduce appliance performance over time. Range hoods, ovens, and air fryers are the most common culprits, as cooking grease bakes onto their surfaces with every use. Understanding what appliance degreasing involves, and how to do it safely with eco-friendly methods, is the first step toward a cleaner, healthier kitchen. This guide covers cleaning schedules, product selection, step-by-step techniques, and the mistakes that undo good effort.
What is appliance degreasing, and why does it matter?
Appliance degreasing is defined as the deliberate use of a solvent or emulsifier to break down and lift grease and oil deposits from appliance surfaces. Emulsifiers work by surrounding grease molecules and suspending them in water so they can be wiped or rinsed away. Without this process, grease hardens into a baked-on layer that standard wiping cannot remove. That hardened residue traps heat, blocks airflow, and forces appliances to work harder than they should.
The importance of degreasing appliances goes beyond appearance. Grease buildup on range hoods reduces extraction efficiency, meaning cooking fumes and moisture linger in your kitchen longer. On ovens, baked-on grease creates smoke and can become a fire hazard. Greasy appliance problems most often stem from poor maintenance habits rather than product failure. Regular degreasing is appliance maintenance cleaning in its most practical form.
How often should you degrease kitchen appliances?
Cleaning frequency is the factor most families get wrong. The good news is that a weekly schedule of 15–20 minutes for general maintenance is enough to keep most appliances in good condition. A monthly deep degreasing session of roughly 30 minutes targets high-use appliances like range hoods and ovens. Daily wipe-downs take only 2–3 minutes and stop grease from ever getting a foothold.
A practical schedule looks like this:
- Daily: Wipe stovetop surfaces and splashback areas with a damp microfiber cloth after cooking. This takes 2–3 minutes and prevents grease from bonding to the surface.
- Weekly: Clean the exterior of the microwave, oven door, and rangehood filters with a mild degreasing solution. Allow 15–20 minutes.
- Monthly: Deep degrease the oven interior, rangehood mesh filters, and air fryer basket. Budget 30 minutes and use a soaking method for removable parts.
Consistent light-touch maintenance prevents grease from hardening into baked-on residue. That means you rely on gentler, eco-friendly cleaners rather than harsh chemical products. For families with children or pets, this matters enormously.
Pro Tip: Set a recurring phone reminder for your monthly deep degrease. Pairing it with another monthly task, like changing the rangehood filter, makes it easier to stick to the habit.
How do you choose the right degreaser for each surface?
Matching the degreaser to the surface is the single most important decision in appliance cleaning. The wrong product can dull a stainless steel finish, cloud a digital display, or strip a protective coating from enamel. Degreaser selection depends on surface type: solvent or citrus-based cleaners suit heavy grease on metal parts, while mild pH-balanced dish soap is safer for stainless steel and digital panels.
| Surface type | Recommended cleaner | What to avoid |
|---|---|---|
| Stainless steel exterior | Mild pH-balanced dish soap or citrus spray | Abrasive scrubbers, bleach |
| Oven interior (enamel) | Baking soda paste or citrus-based degreaser | Ammonia-based products |
| Rangehood mesh filters | Boiling water with degreasing dish soap | Harsh solvents that corrode mesh |
| Digital control panels | Barely damp microfiber cloth only | Any liquid spray applied directly |
| Glass oven door | Citrus or vinegar-based solution | Steel wool or abrasive pads |
Ammonia-based window cleaners can cut grease effectively but risk damaging granite benchtops, timber cabinetry, and certain appliance finishes. Always test any new product on a hidden area first. For families seeking non-abrasive cleaning options, citrus-based and baking soda solutions deliver strong results without the risk.
Pro Tip: Keep two spray bottles in your kitchen: one with a diluted citrus degreaser for metal surfaces and one with plain water for digital panels. Grabbing the wrong bottle in a hurry is a common and costly mistake.
Step-by-step eco-friendly degreasing for common appliances
Eco-friendly degreasing works just as well as chemical-heavy methods when you follow the right steps. The key is using the correct mixture, giving it time to work, and choosing the right tools for each surface.
The core eco-friendly mixture
An effective eco-friendly degreasing mixture combines boiling water, one tablespoon of degreasing dish soap, and half a cup of baking soda. This combination emulsifies grease at a molecular level without releasing toxic fumes. It suits air fryer baskets, rangehood filters, and oven grates equally well.
Cleaning steps for kitchen appliances
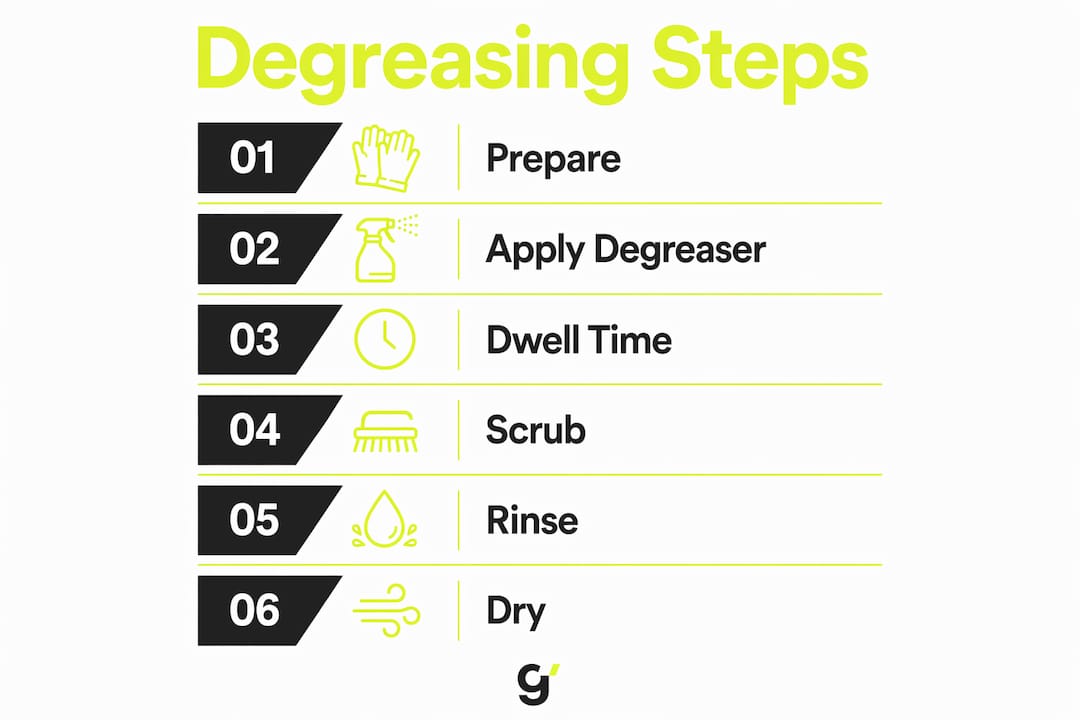
- Remove all detachable parts. Pull out rangehood filters, air fryer baskets, and oven racks before you start.
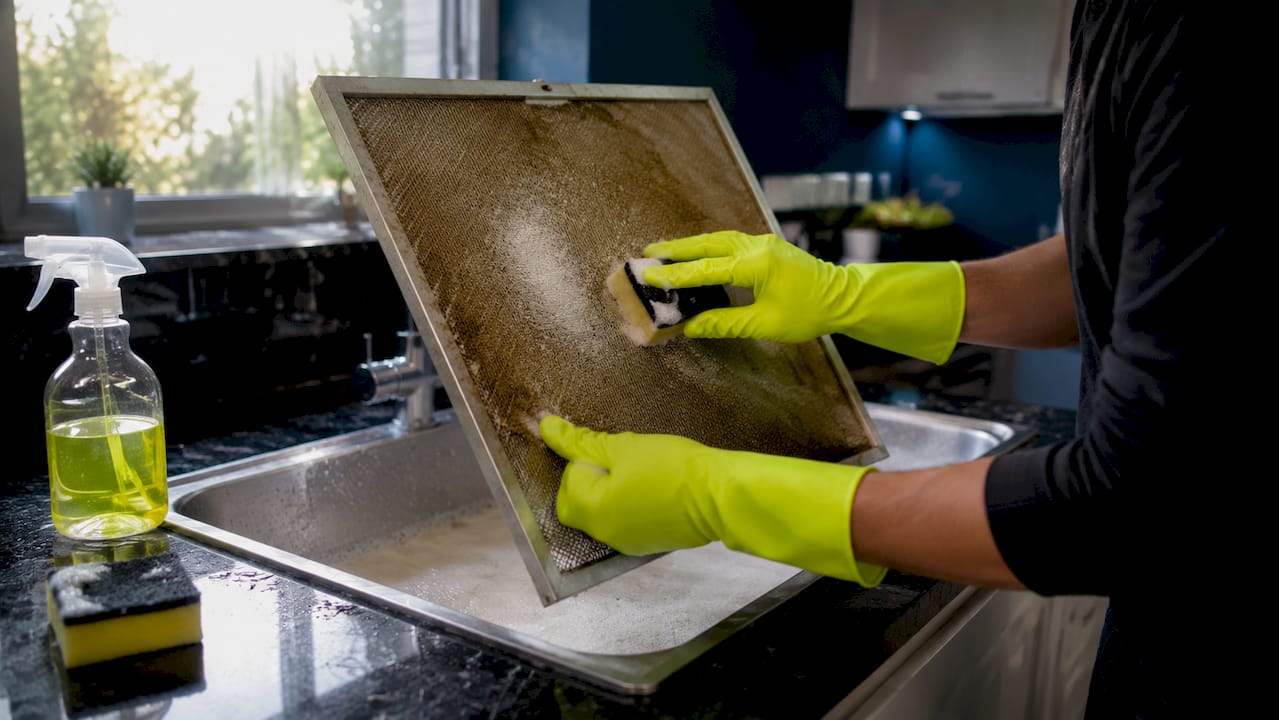
- Soak removable parts for 15–30 minutes. Submerge them in the eco-friendly mixture. Soaking breaks down stubborn grease far more effectively than scrubbing alone.
- Apply your chosen degreaser to fixed surfaces. Spray or spread it on oven interiors, stovetop surfaces, and rangehood exteriors. Let it sit for at least 5 minutes.
- Wipe stainless steel surfaces in the direction of the grain. Wiping with the metal grain prevents micro-scratches that permanently dull the finish.
- Use a microfiber cloth for all wiping. Microfiber lifts grease without scratching and does not leave lint behind.
- Clean digital panels with a barely damp cloth only. Water can cloud or damage electronic components inside appliances.
- Rinse removable parts thoroughly and dry before replacing. Buff stainless steel surfaces with a dry cloth or a light vinegar solution to restore shine.
Key points to keep in mind during the process:
- Never spray liquid directly onto control panels or digital displays.
- Use a soft-bristled brush for mesh filters to dislodge grease without bending the mesh.
- Rinse baking soda residue completely, as it can leave a white film if left to dry.
- For green cleaning supplies suited to Australian homes, look for products certified as biodegradable and phosphate-free.
Pro Tip: After soaking rangehood filters, use an old toothbrush to scrub the mesh under warm running water. The grease lifts off in seconds after a proper soak, with almost no effort.
Common mistakes that ruin your degreasing results
The most damaging mistake in appliance degreasing is skipping dwell time. Degreasers need 5–15 minutes to emulsify grease at the molecular level before you wipe or scrub. Wiping immediately after applying a degreaser simply spreads the grease around rather than removing it.
Other mistakes that undermine good effort:
- Wiping stainless steel in circles. This creates visible scratches across the grain and dulls the finish permanently.
- Using water on digital or electrical components. Even a small amount of moisture can cause clouding or internal faults in appliance electronics.
- Applying full-strength solvent cleaners to delicate finishes. Enamel and powder-coated surfaces need diluted or mild solutions.
- Skipping the rinse step. Degreaser residue left on surfaces attracts new grease faster than a clean surface does.
Good maintenance habits reduce reliance on aggressive cleaners by stopping grease from hardening in the first place. A two-minute wipe after cooking is worth more than an hour of scrubbing a neglected oven. For families wanting to maintain cleanliness between deep cleans, small daily habits deliver the biggest long-term results.
Pro Tip: After applying your degreaser, set a timer for 10 minutes and walk away. That single habit will double the effectiveness of whatever product you are using.
Key takeaways
Appliance degreasing works best when you match the cleaner to the surface, respect dwell time, and build a consistent maintenance routine rather than relying on occasional heavy scrubbing.
| Point | Details |
|---|---|
| Define the process correctly | Degreasing uses solvents or emulsifiers to lift grease, not just mask it. |
| Match cleaner to surface | Use citrus or solvent cleaners on metal; mild pH-balanced soap on stainless steel and digital panels. |
| Respect dwell time | Leave degreasers for 5–15 minutes before wiping to emulsify grease fully. |
| Follow a cleaning schedule | Daily 2–3 minute wipe-downs and monthly 30-minute deep cleans prevent heavy buildup. |
| Protect sensitive components | Never apply liquid directly to digital panels; use a barely damp microfiber cloth only. |
The habit that changes everything
After years of watching kitchens get cleaned, the pattern is always the same. Families who deep clean once every few months spend far more time and effort than those who wipe down surfaces after every cook. The grease that takes an hour to scrub off in january could have been removed in two minutes the night it was made.
Eco-friendly mixtures like baking soda and dish soap genuinely work. I have seen rangehood filters come out of a 20-minute soak looking close to new, with no chemical smell and no residue left behind. The key is giving the mixture time to do its job rather than reaching for a scrubbing pad.
Understanding your appliance surfaces also protects your investment. Stainless steel scratched by circular wiping never fully recovers its finish. Enamel damaged by ammonia-based products develops pitting that traps grease even more aggressively. Knowing which cleaner suits which surface is not overcaution. It is the difference between an appliance that lasts a decade and one that looks worn within two years.
The families who get the best results are not the ones using the most powerful products. They are the ones who clean little and often, choose the right tool for each surface, and never skip the dwell time.
— Lead
When the grease is beyond a DIY fix
Some grease situations go past what a weekend clean can handle. Post-renovation kitchens, long-neglected rental properties, and commercial-grade splatter all call for a different level of response.

Grimescene's Rapid Response 2-Hour Tactical Clean is built for exactly these situations. The service uses professional-grade, non-toxic agents that neutralise grease buildup without harsh chemicals, making it safe for homes with children and pets. Grimescene's team works to the same eco-friendly standards covered throughout this guide, just with professional tools and the experience to tackle surfaces that have been neglected for months. If your appliances need more than a routine clean, contact Grimescene to book a session that gets the job done properly.
FAQ
What does appliance degreasing actually do?
Appliance degreasing uses solvents or emulsifying agents to break down grease and oil deposits so they can be wiped away cleanly. Without it, grease hardens into baked-on residue that degrades appliance performance and attracts dust.
How often should I deep degrease my kitchen appliances?
A monthly deep degreasing session of roughly 30 minutes is recommended for high-use appliances like ovens and rangehoods. Daily 2–3 minute wipe-downs after cooking prevent grease from building up between sessions.
Is baking soda safe to use on all appliance surfaces?
Baking soda mixed with dish soap and boiling water is safe for metal parts, oven interiors, and rangehood filters. Avoid using it on digital panels or electronic components; use a barely damp microfiber cloth on those surfaces instead.
Why does my degreaser leave a greasy film behind?
Wiping too soon is the most common cause. Degreasers need 5–15 minutes of dwell time to emulsify grease before you wipe. Skipping this step spreads the grease rather than removing it.
Can I use the same cleaner on stainless steel and oven enamel?
No. Stainless steel needs a mild pH-balanced soap or citrus spray, while oven enamel tolerates a baking soda paste or citrus-based degreaser. Using the wrong product on either surface risks permanent damage to the finish.